Boss Walkthroughs — Defeat Every Genma Boss in Onimusha: Way of the Sword
Onimusha: Way of the Sword pits Miyamoto Musashi against a gauntlet of fearsome Genma bosses across a demon-infested Edo-period Kyoto. This walkthrough covers every major boss encounter, breaking down attack patterns, phase transitions, and the soul-absorption tactics you need to claim victory.
Essential Boss-Fighting Mechanics
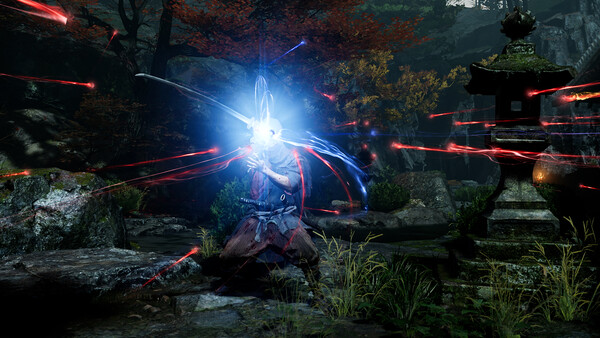
Before tackling any boss, make sure you understand the two systems that define Onimusha combat. First is the Issen counter — a precisely timed attack executed at the last possible moment before an enemy strike connects. Against lesser Genma an Issen is an instant kill; against bosses it deals tremendous damage and often staggers them into a vulnerable state. Mastering the Issen timing is non-negotiable for the harder encounters later in the game, so practice the parry window on regular enemies until it becomes second nature.
Second is Soul Absorption. After downing enemies — and during key moments in boss fights — hold L2 to channel the Oni Gauntlet and draw in the souls they release. Different soul colors serve different purposes: some grant experience to raise Musashi's stats, others restore health, and others refill your special-attack gauges. Managing soul pickup mid-boss-fight is critical, because ignoring dropped souls can leave you without the health or meter you need to survive the next phase.
If a boss is giving you trouble, visit the Rokudo-chinnoji Temple hub area and ring the temple bell. This transports Musashi into a separate dimension where you can rematch any previously defeated boss. Use these rematches to farm experience souls, practice attack patterns, and level up before pushing deeper into Kyoto.
Sasaki Ganryu
Sasaki Ganryu is the first true test of your swordsmanship and serves as a skill check for the mechanics introduced in the opening hours. Ganryu fights like a human duelist rather than a rampaging demon, so expect measured, deliberate sword combos with clear wind-up animations. Watch for his overhead slash — the wind-up is slow enough to Issen if you stay calm, and landing one early in the fight sets the tempo in your favor.
In his second phase Ganryu becomes more aggressive and mixes in quick lateral cuts that punish over-committed dodge rolls. Rather than trying to stay at range, close the distance and pressure him between his combo strings. Absorb any souls he drops immediately, as the health recovery can offset chip damage and keep you in the fight without burning healing items.

Rasho-gan — Yasui Konpiragu Shrine
Rasho-gan awaits inside the Yasui Konpiragu Shrine and represents a significant difficulty spike. Its first phase is manageable if you respect its wide sweeping attacks and dodge laterally rather than backward. Position yourself at its flank whenever possible and get in two or three hits before retreating — greed will be punished.
The real danger begins in phase two, when Rasho-gan introduces devastating grab attacks. These grabs have deceptive range and can one-shot an under-leveled Musashi, so recognizing the tell is essential: watch for the brief pause and arm extension that precedes each grab, and dodge to the side immediately. If your health and special-attack gauges feel inadequate for this fight, step back and farm souls — the Daidara encounter in the Oni Refuge is an excellent source of experience, and even a few extra stat points can make the difference between surviving a grab and seeing the game-over screen.
After each grab attempt Rasho-gan is left open for a short window. This is your best opportunity to land an Issen counter or unload a full combo. Patience in this phase is more important than aggression; wait for the grab, punish the recovery, absorb souls, and repeat.

Daidara — Oni Refuge
The Daidara boss fight in the Oni Refuge is unique because it doubles as one of the best soul-farming opportunities in the game. Daidara will actively consume loose souls on the battlefield, and as it absorbs them its stomach visibly swells. Rather than racing to grab every soul yourself, you can intentionally let Daidara gorge — then focus your attacks on its engorged stomach to burst it open and release a massive payload of experience-granting souls all at once.
This risk-reward dynamic defines the encounter. A cautious player can absorb souls normally and whittle Daidara down in a conventional fight, but a player who understands the mechanic can walk away with far more experience by letting the beast feed and then punishing it. Target the stomach with your strongest combos once it is fully distended, absorb the soul cascade with L2, and repeat the cycle.
Be warned that a well-fed Daidara hits harder and moves more aggressively, so do not let it consume souls indefinitely without a plan to capitalize. If you are here primarily to farm stats, the temple bell at Rokudo-chinnoji lets you replay this fight as many times as you need.
Byakko-e — Secret Boss
Byakko-e is a hidden boss — a ferocious yeti-like creature that serves as the ultimate challenge available in the demo and one of the toughest encounters in the game. To unlock the fight, you must successfully land ten Issen counters during normal gameplay; a golden counter in the upper-left corner of the screen tracks your progress. Once you hit ten and complete the current area, the special challenge becomes available.
This fight is deliberately punishing. Byakko-e is fast despite its size, chains attacks with minimal recovery windows, and hits hard enough to end a run in just a few mistakes. The key is to stay disciplined with your Issen timing — the counter that unlocked the fight is also the primary tool for winning it. Each successful Issen creates a brief damage window; use it for two or three clean hits, then reset to neutral and wait for the next opening.
There is no shortcut here: Byakko-e demands mastery of every core mechanic — precise Issen counters, efficient soul absorption for mid-fight healing, and patient positioning. Make sure Musashi's stats are as high as possible before attempting this encounter, and treat every attempt as practice for reading the boss's tells. Persistence and pattern recognition will eventually carry you through.